
RGB Lightning Node Swap Guide (v0.0.6)
Swap Test Build Walkthrough
Prerequisites
Before you begin, make sure the following requirements are met:
-
Prepare two nodes: Alice and Bob.
-
Fund both the Alice and Bob nodes with BTC.
-
Create a UTXO on each node.
-
Import an RGB asset into the Alice node.
-
Connect the Alice and Bob nodes, and open an RGB-enabled channel between them, initiated by Alice.
Once these prerequisites are complete, you can proceed with the Swap test walkthrough.
For the smoothest and most reliable experience, use a fresh installation package and create new nodes specifically for testing this feature.
Workflow: BTC → RGB
Step 1: Alice Sends BTC to Bob Through the Channel
Actor: Alice
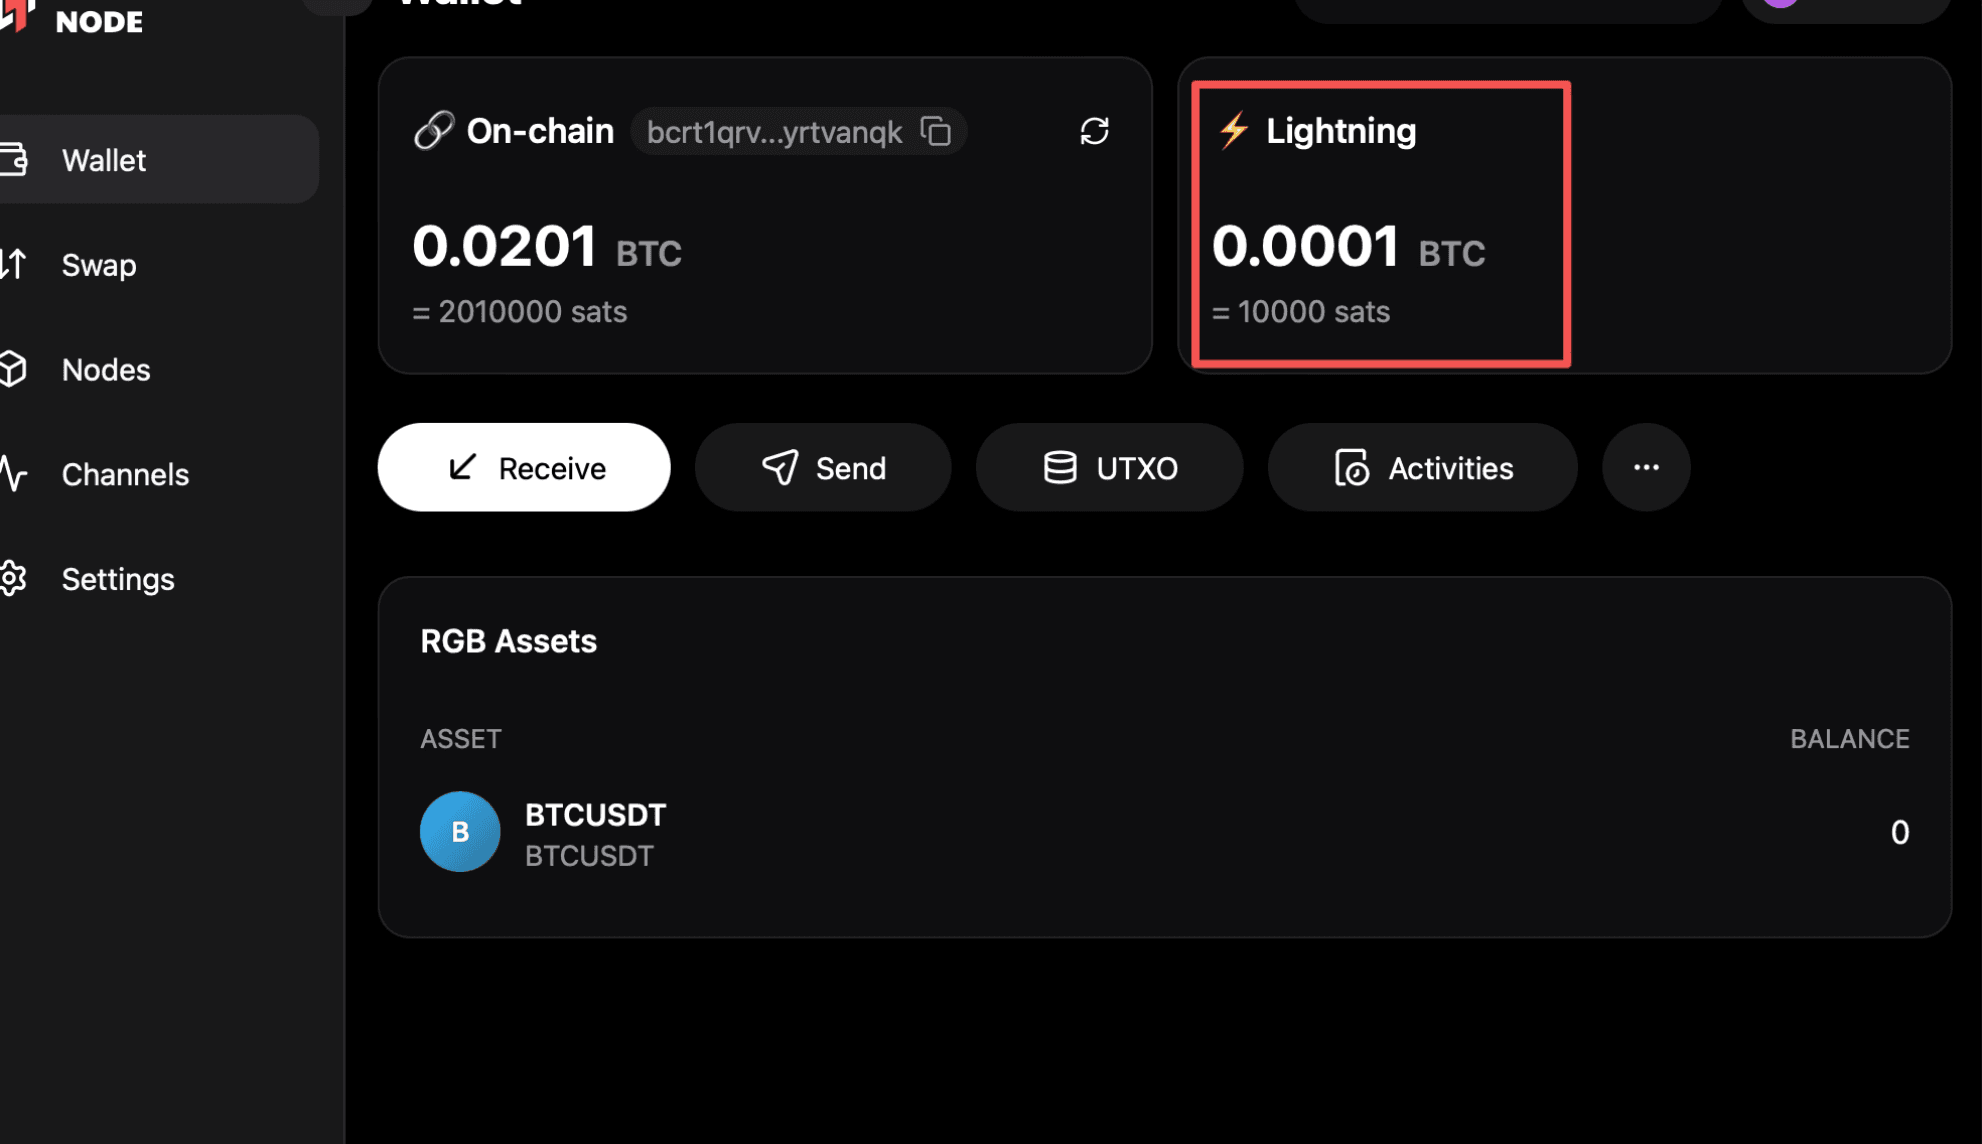
Because Alice initiated the channel, the channel’s initial balance is held locally on Alice’s side. Before Bob can purchase Alice’s RGB assets, Bob needs sufficient local BTC liquidity in the channel. Alice must therefore first send BTC to Bob through the Lightning channel.
The BTC transfer flow is straightforward:
- Bob creates a BTC invoice.
- Alice pays the invoice.
- Once Lightning BTC appears in Bob’s dashboard, the BTC transfer is complete.
Step 2: Create a Swap Order
Actor: Bob
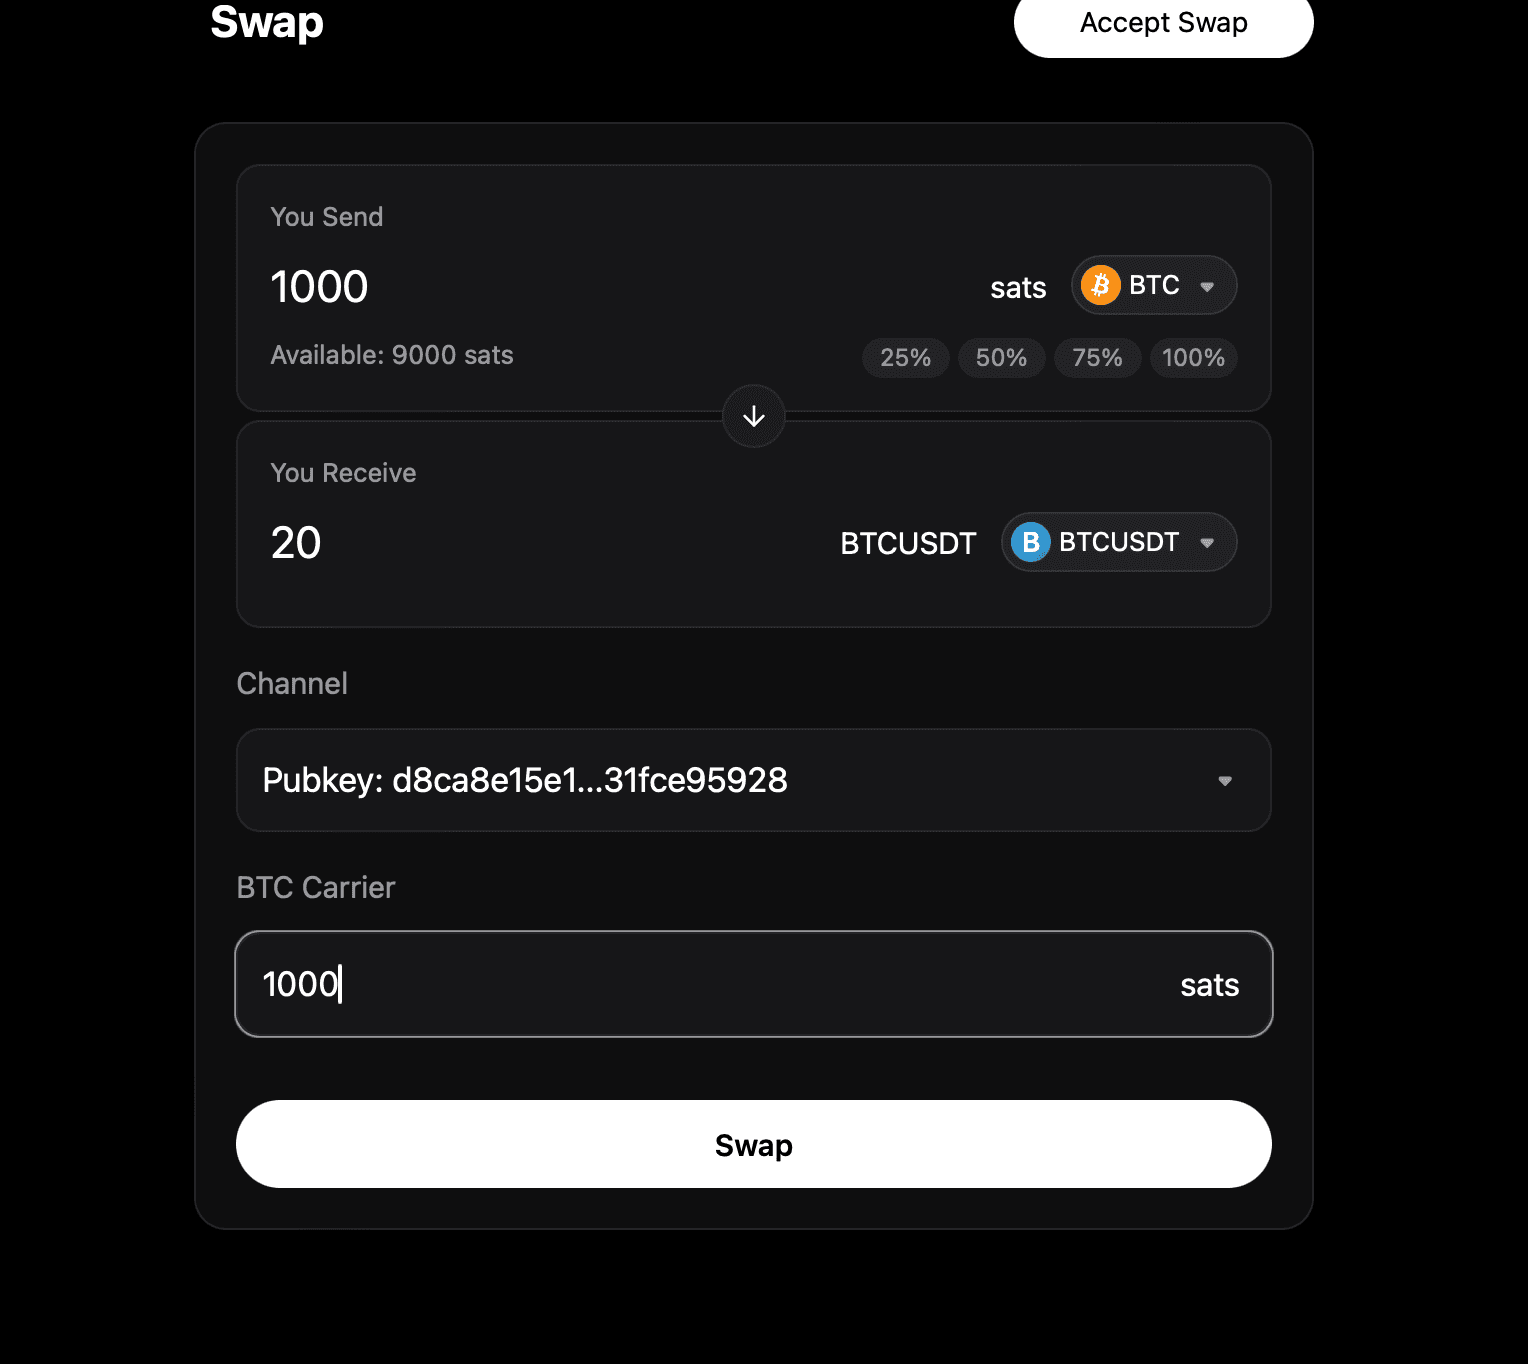
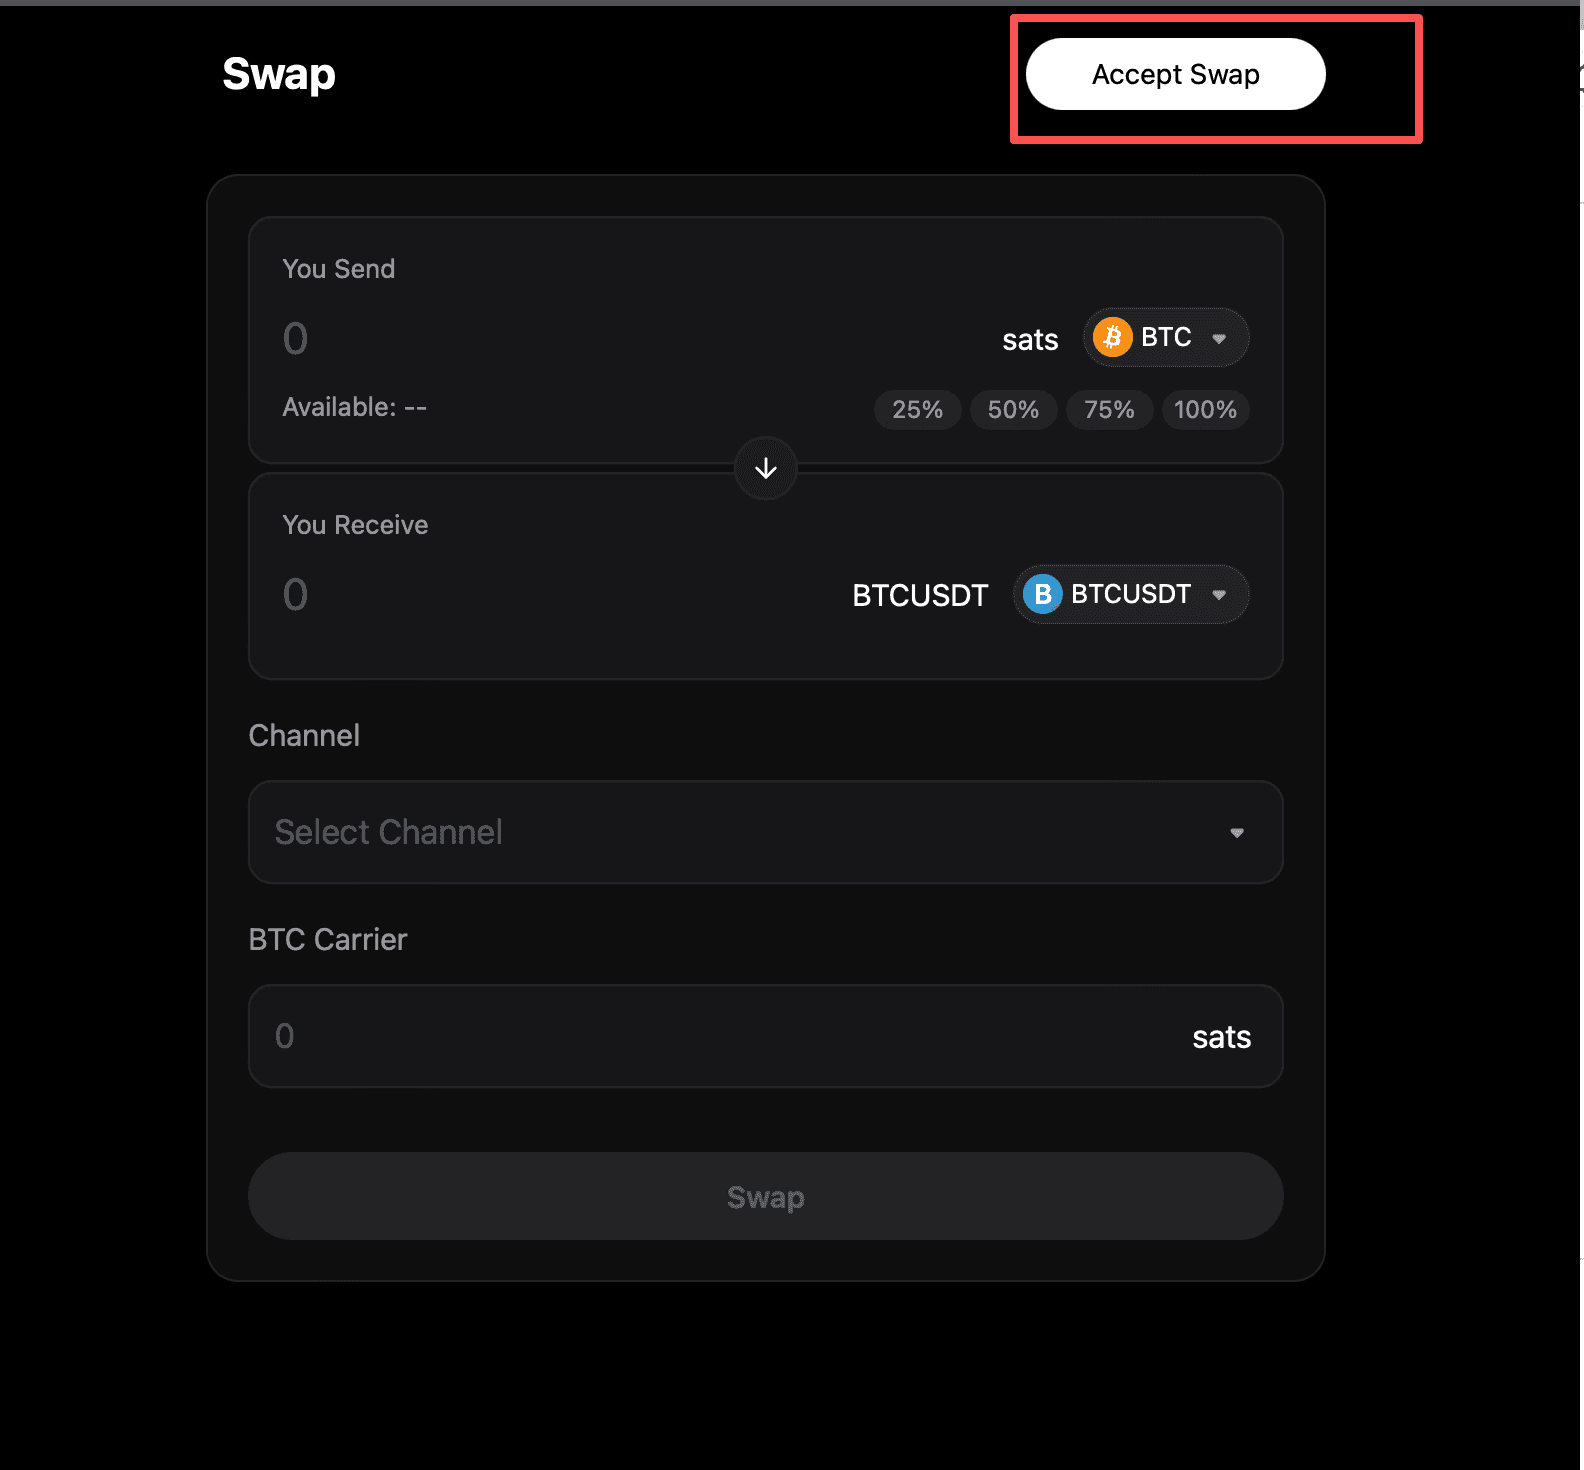
After receiving BTC, Bob can create a Swap order from the Swap feature.
After a channel is selected, the Swap panel automatically detects the BTC and RGB assets available in that channel.
Complete the following steps:
- Enter the BTC amount and RGB asset amount to be swapped.
- Enter the BTC Carrier value. A value of
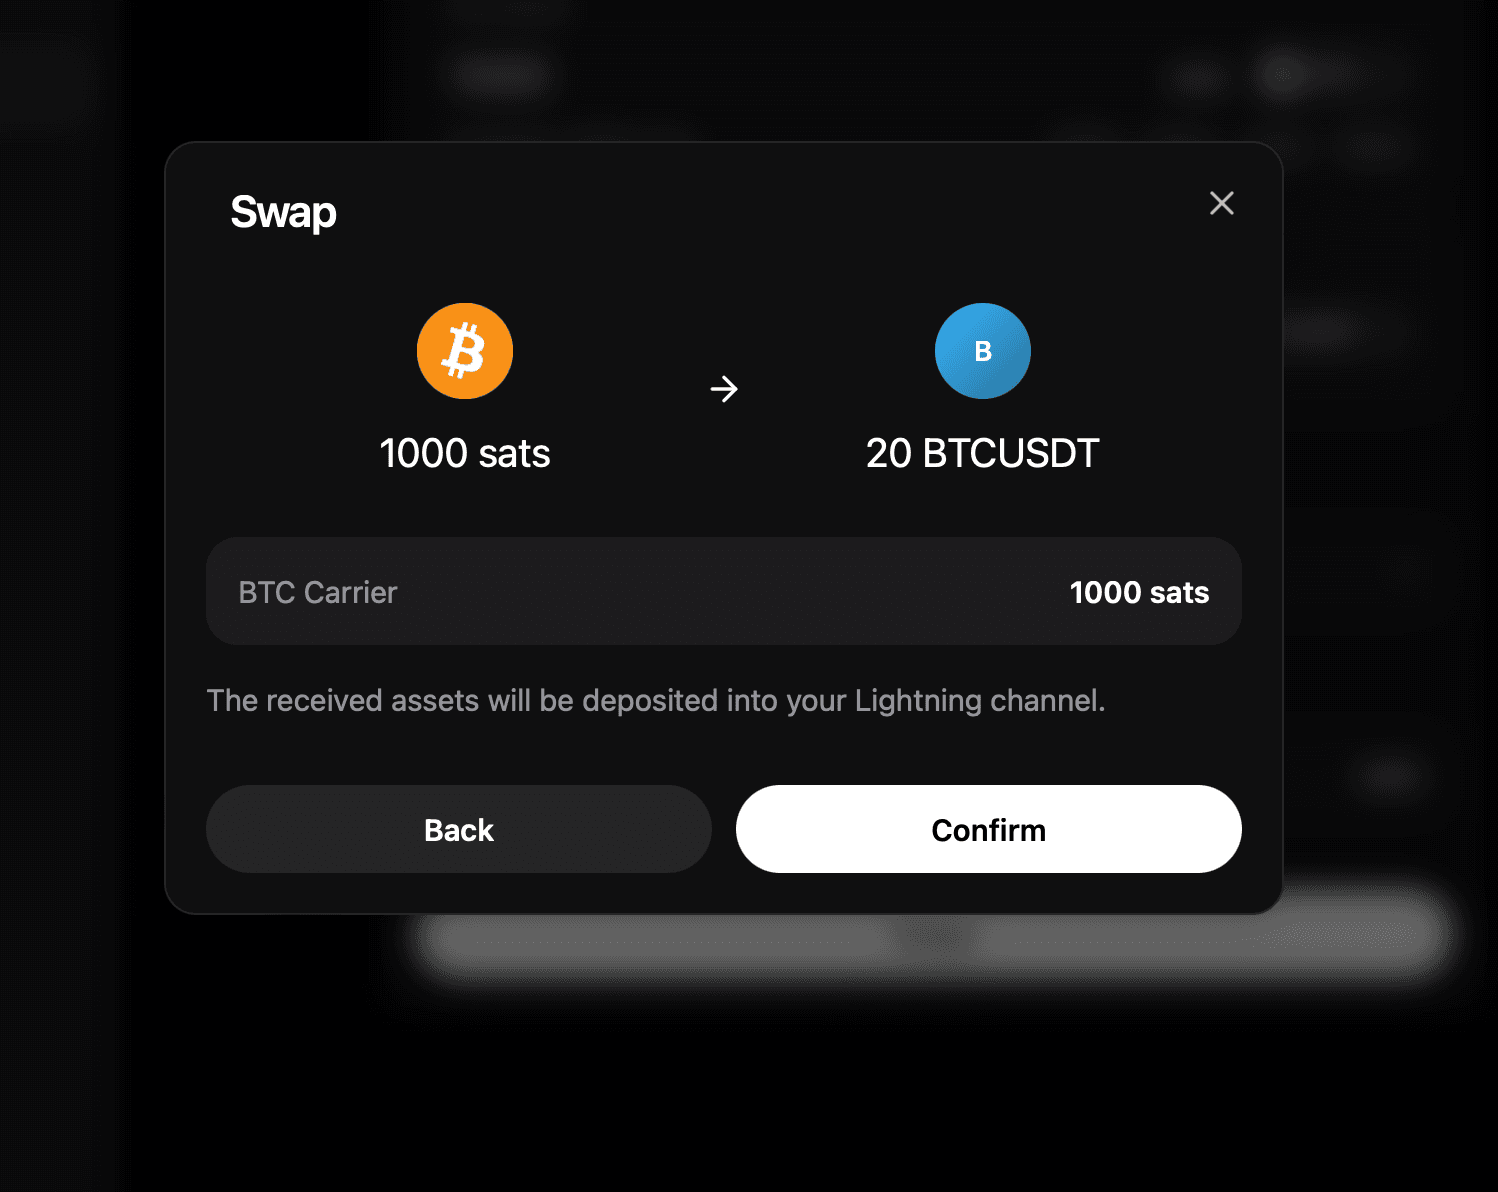
1000is generally sufficient for testing. - Click Swap and confirm the submission.
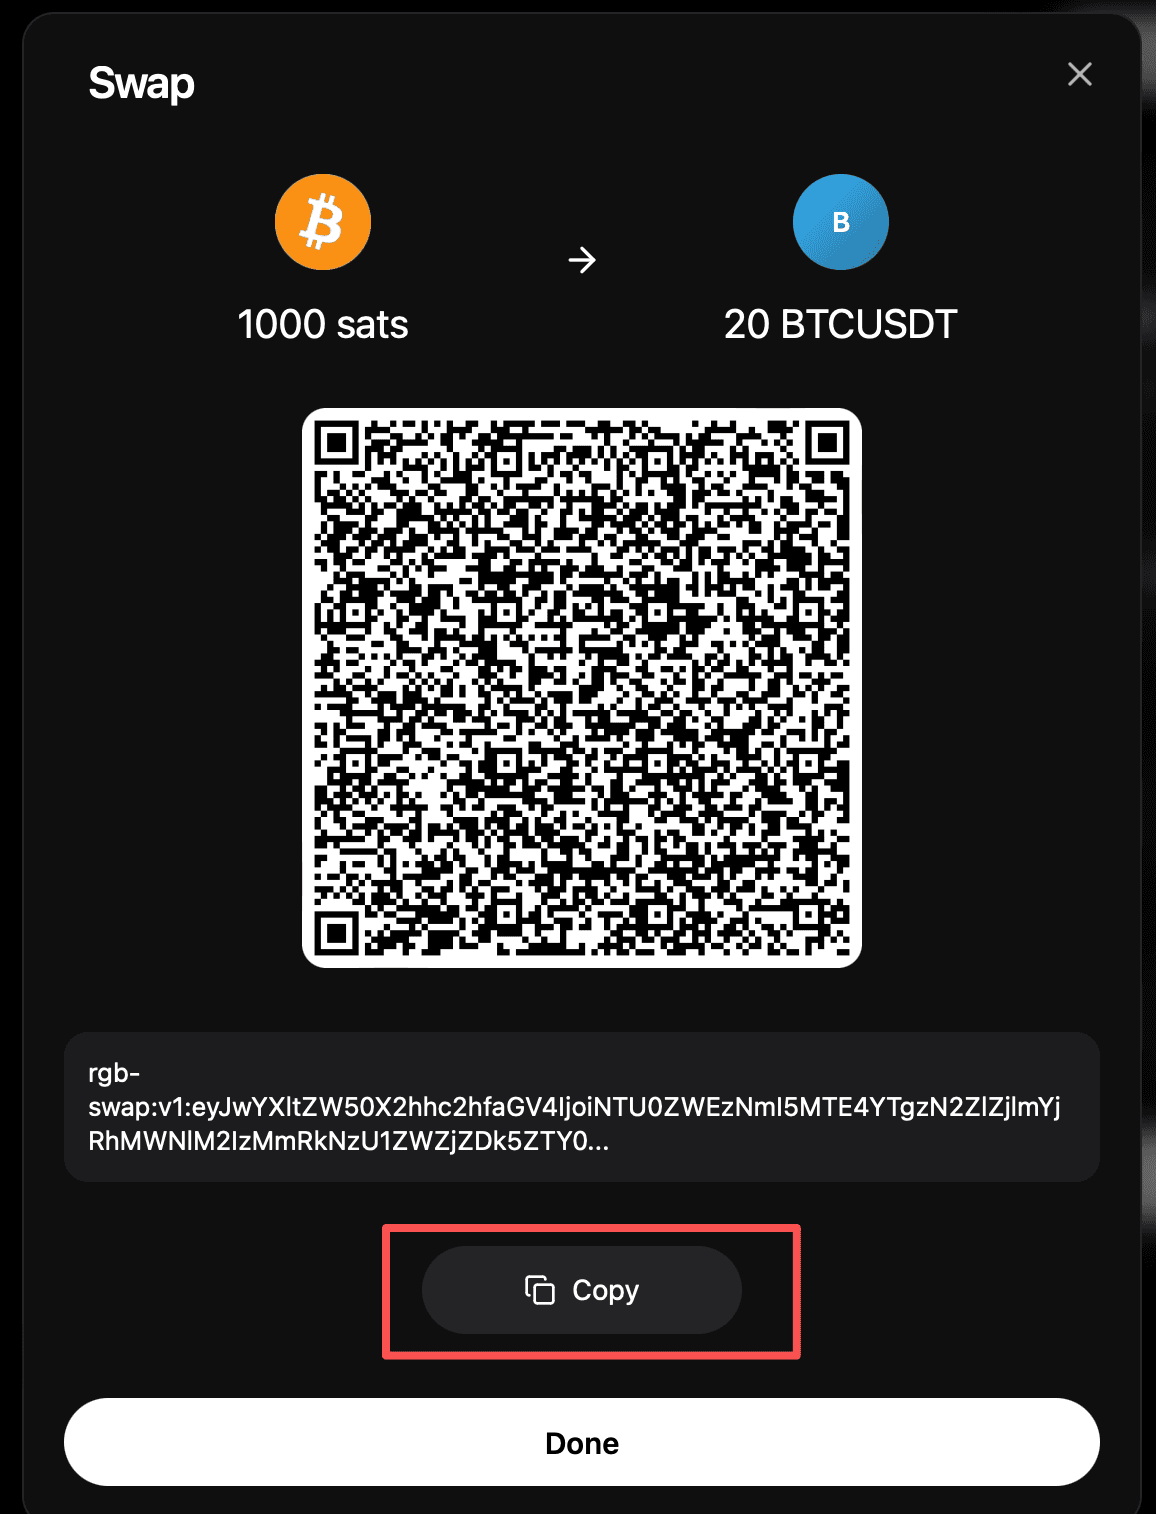
- On the invoice screen that appears, copy the generated RGB invoice.
Be sure to copy the RGB invoice. The Swap cannot be completed without it.
See the illustration below for reference.
Step 3: Accept the Swap
Actor: Alice
After copying the RGB invoice, switch to the Alice node.
- On the Swap page, click Accept Swap in the upper-right corner.
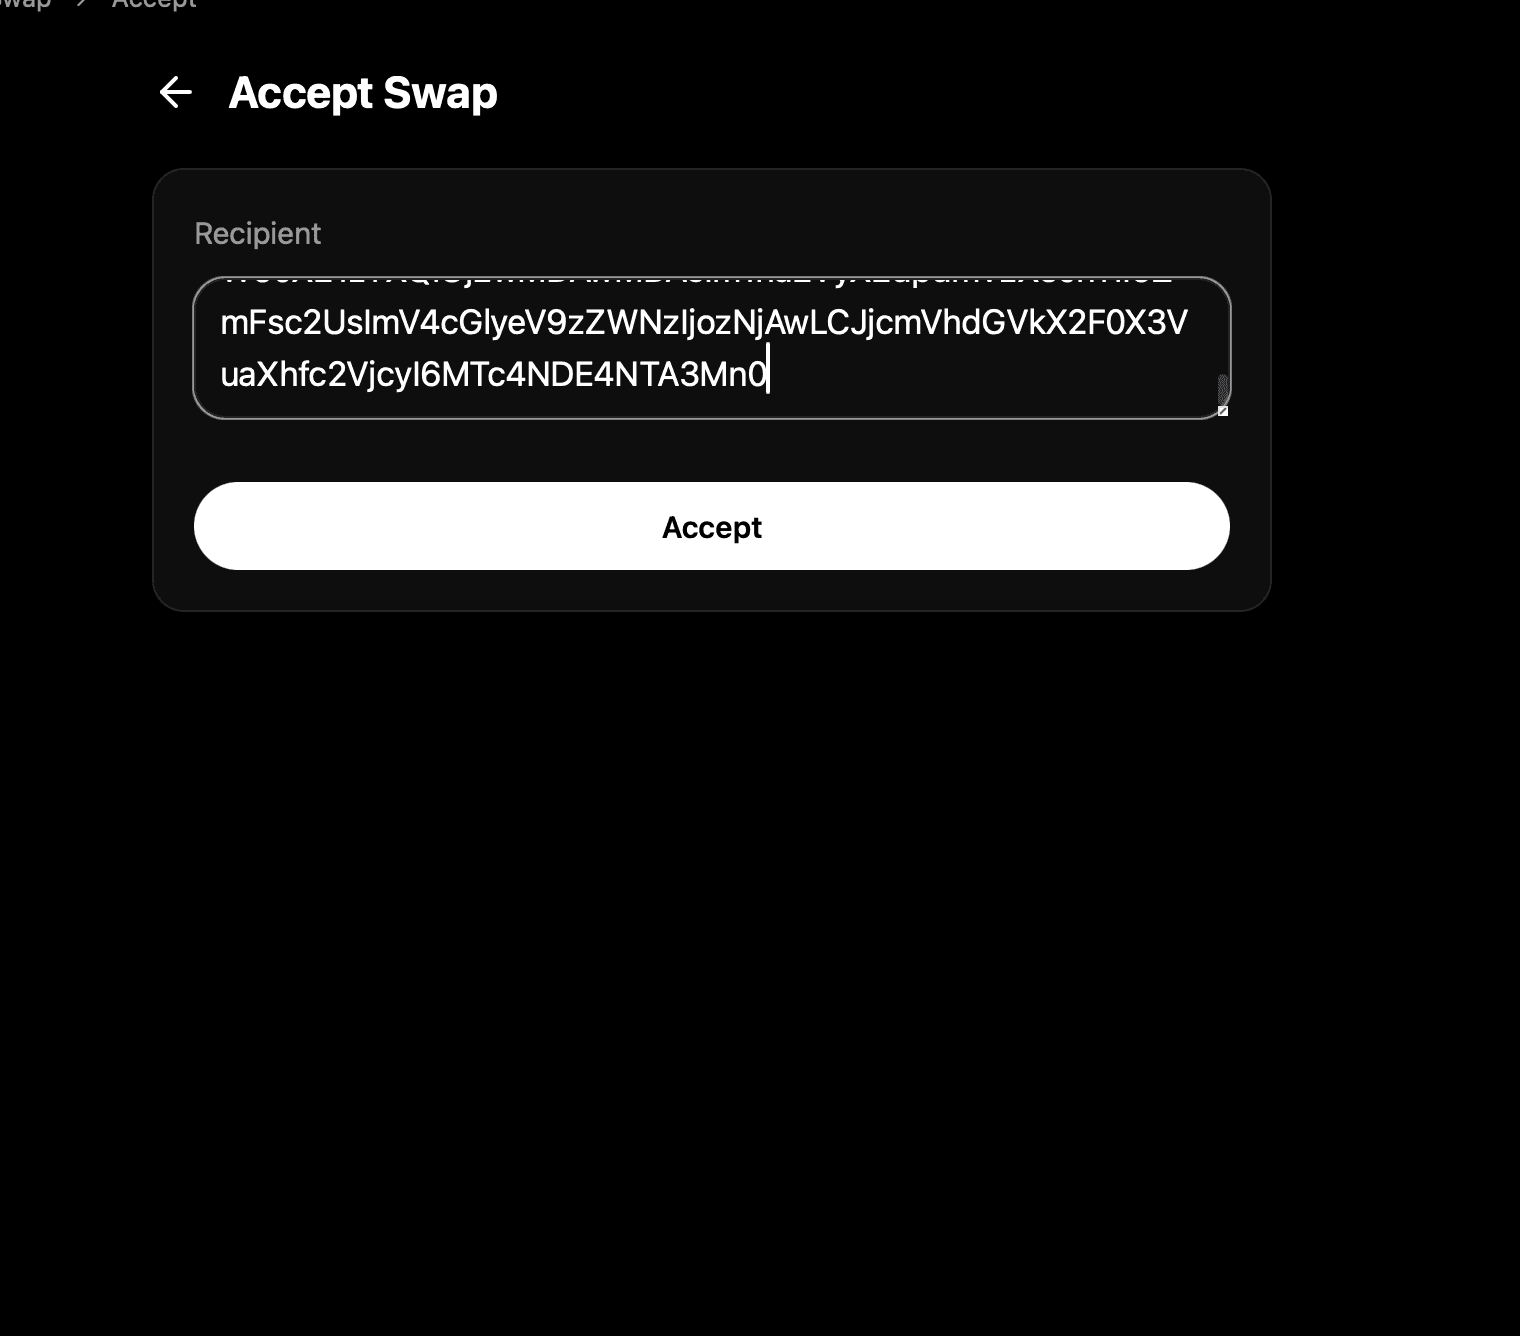
- Paste the copied RGB invoice into the Accept Swap page.
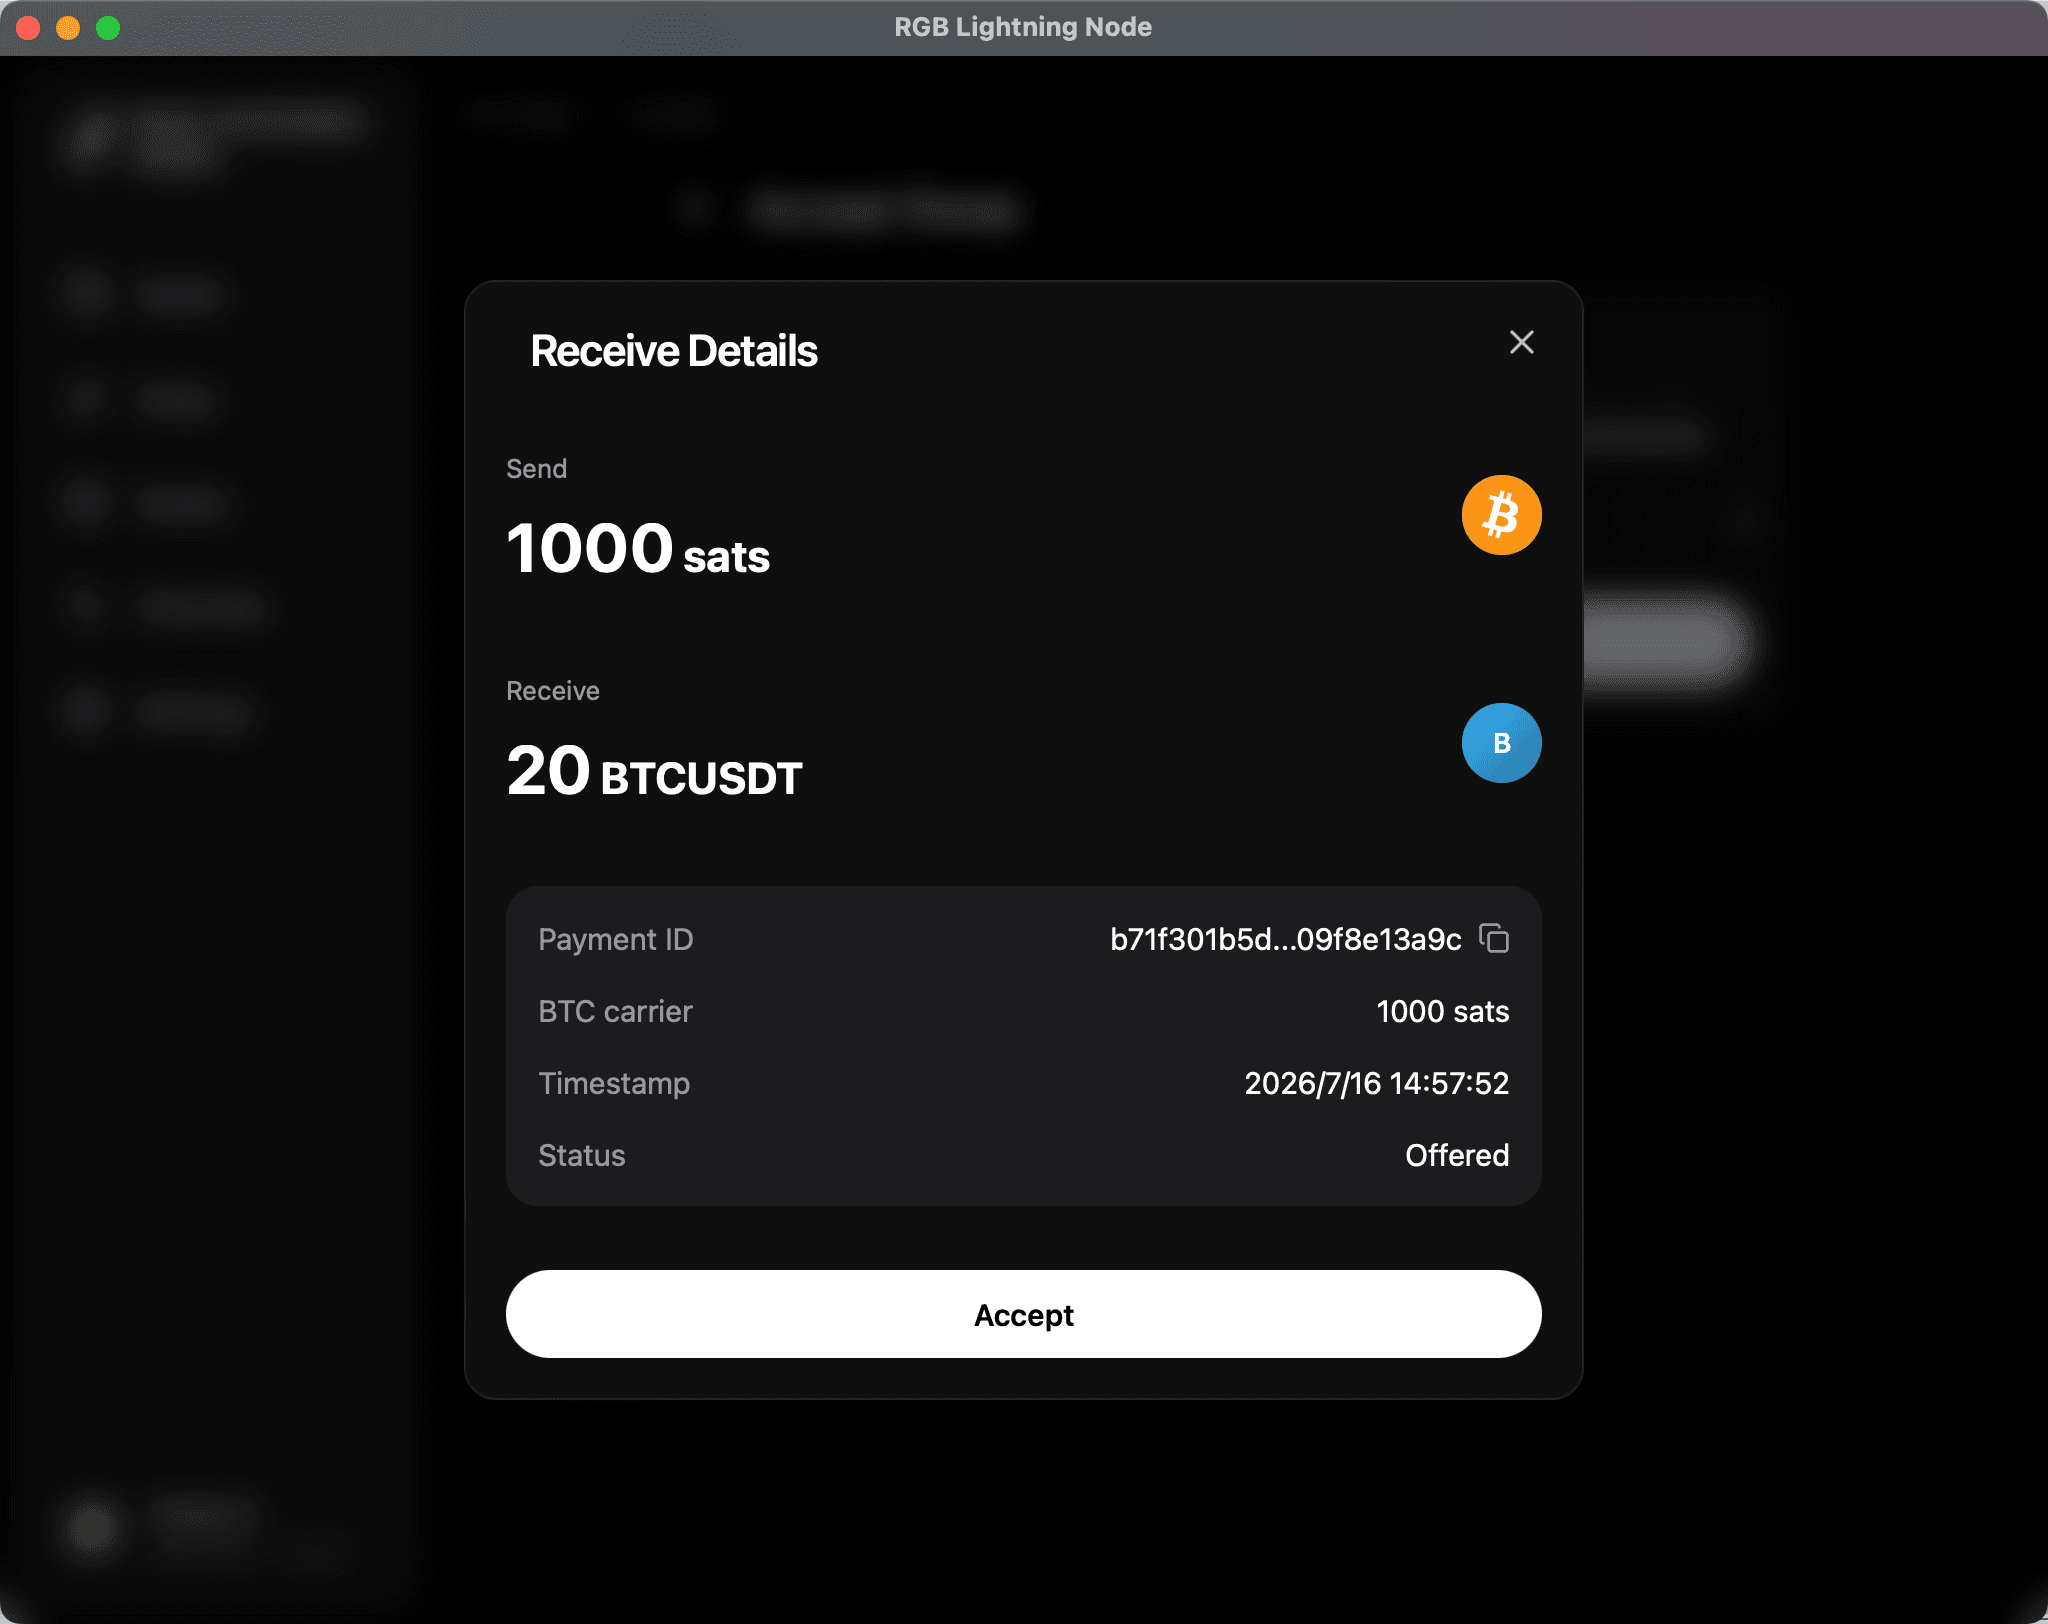
- Click Accept to confirm acceptance of the Swap quote.
See the illustration below for reference.
Step 4: Execute the Swap
Actor: Bob
Once Alice has accepted the Swap, switch back to the Bob node.
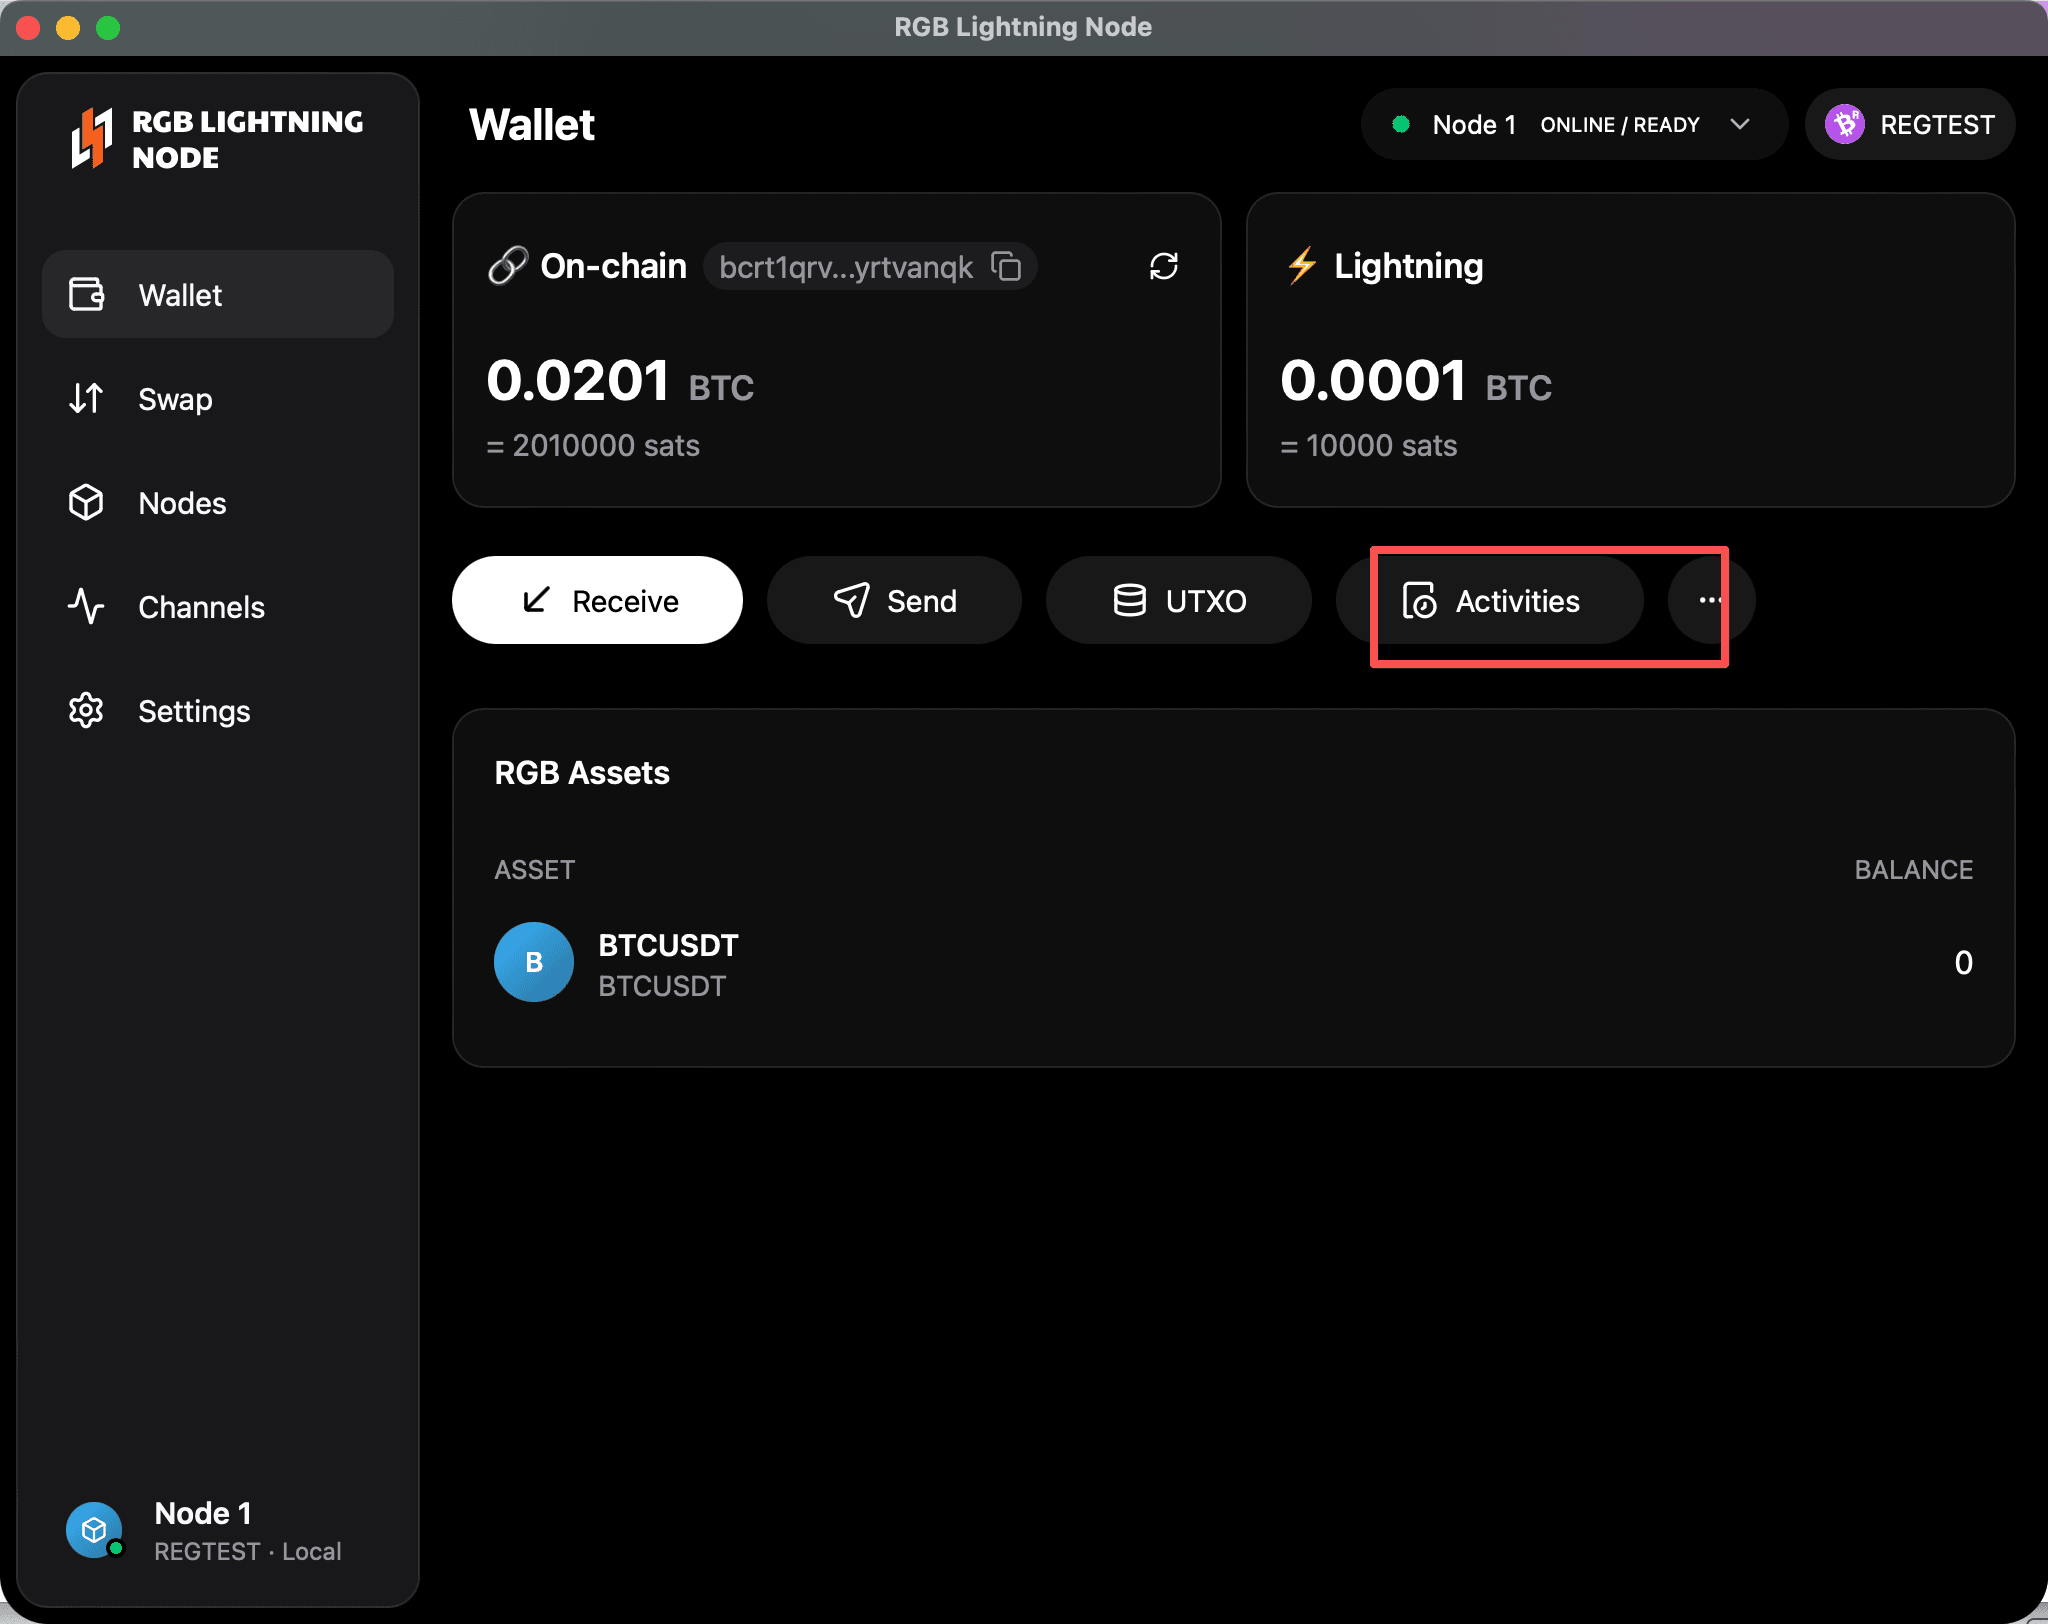
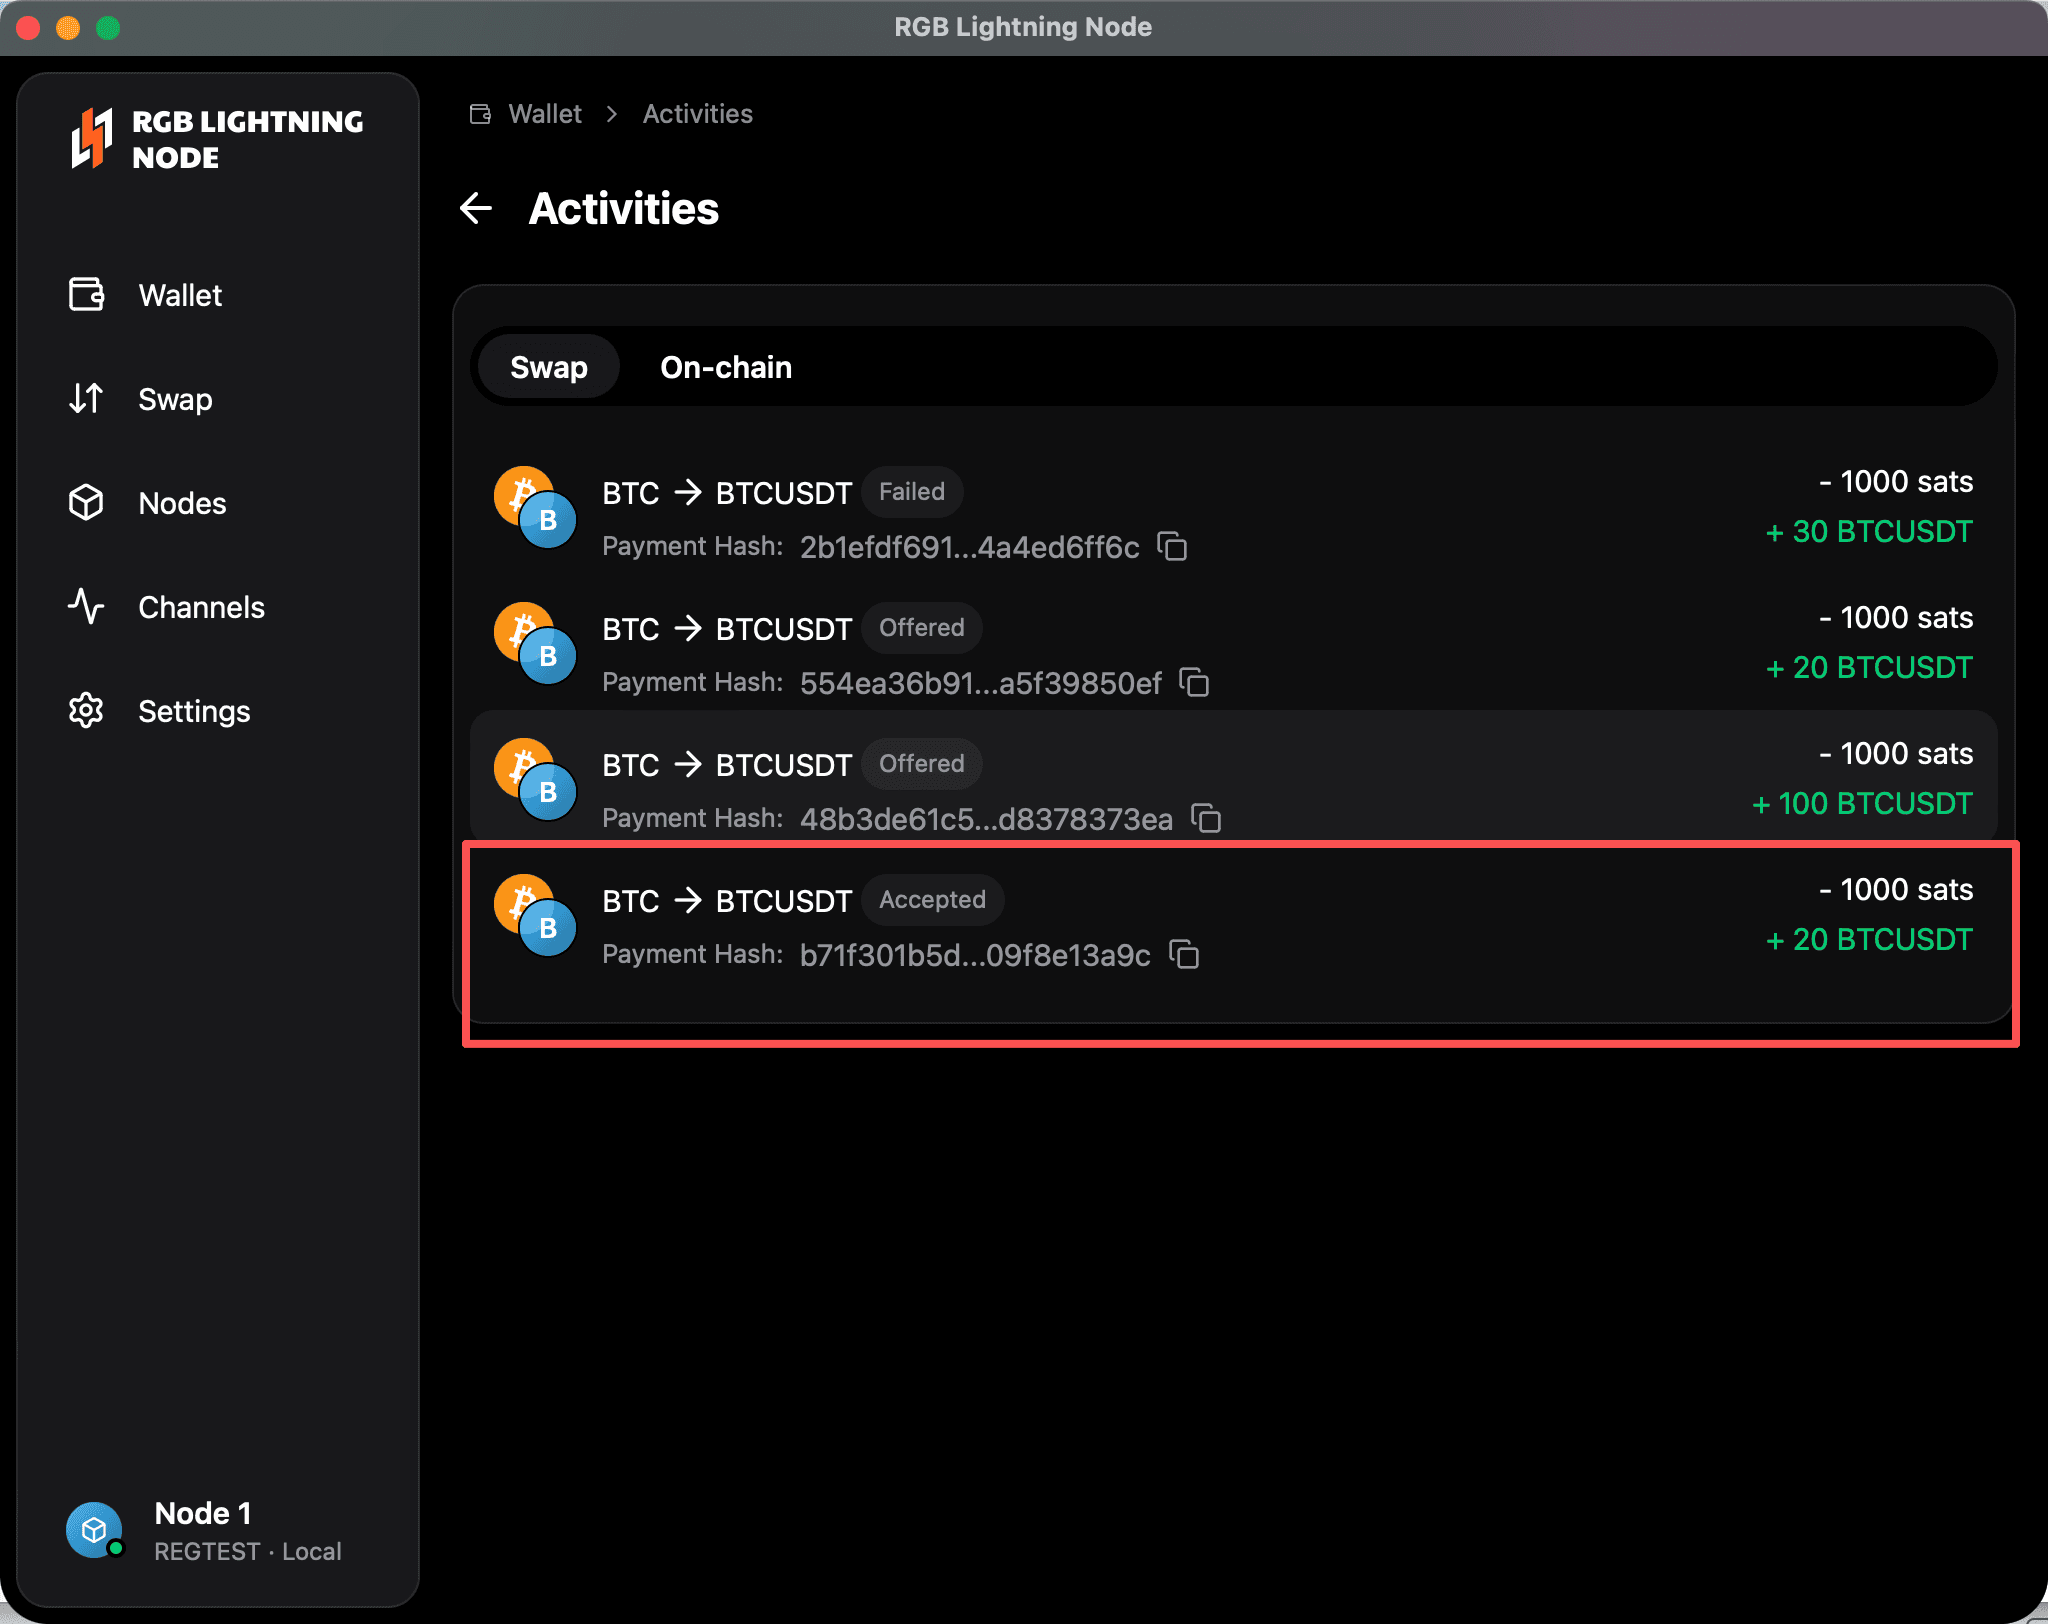
- On Bob’s home page, open Wallet and then go to Activities.
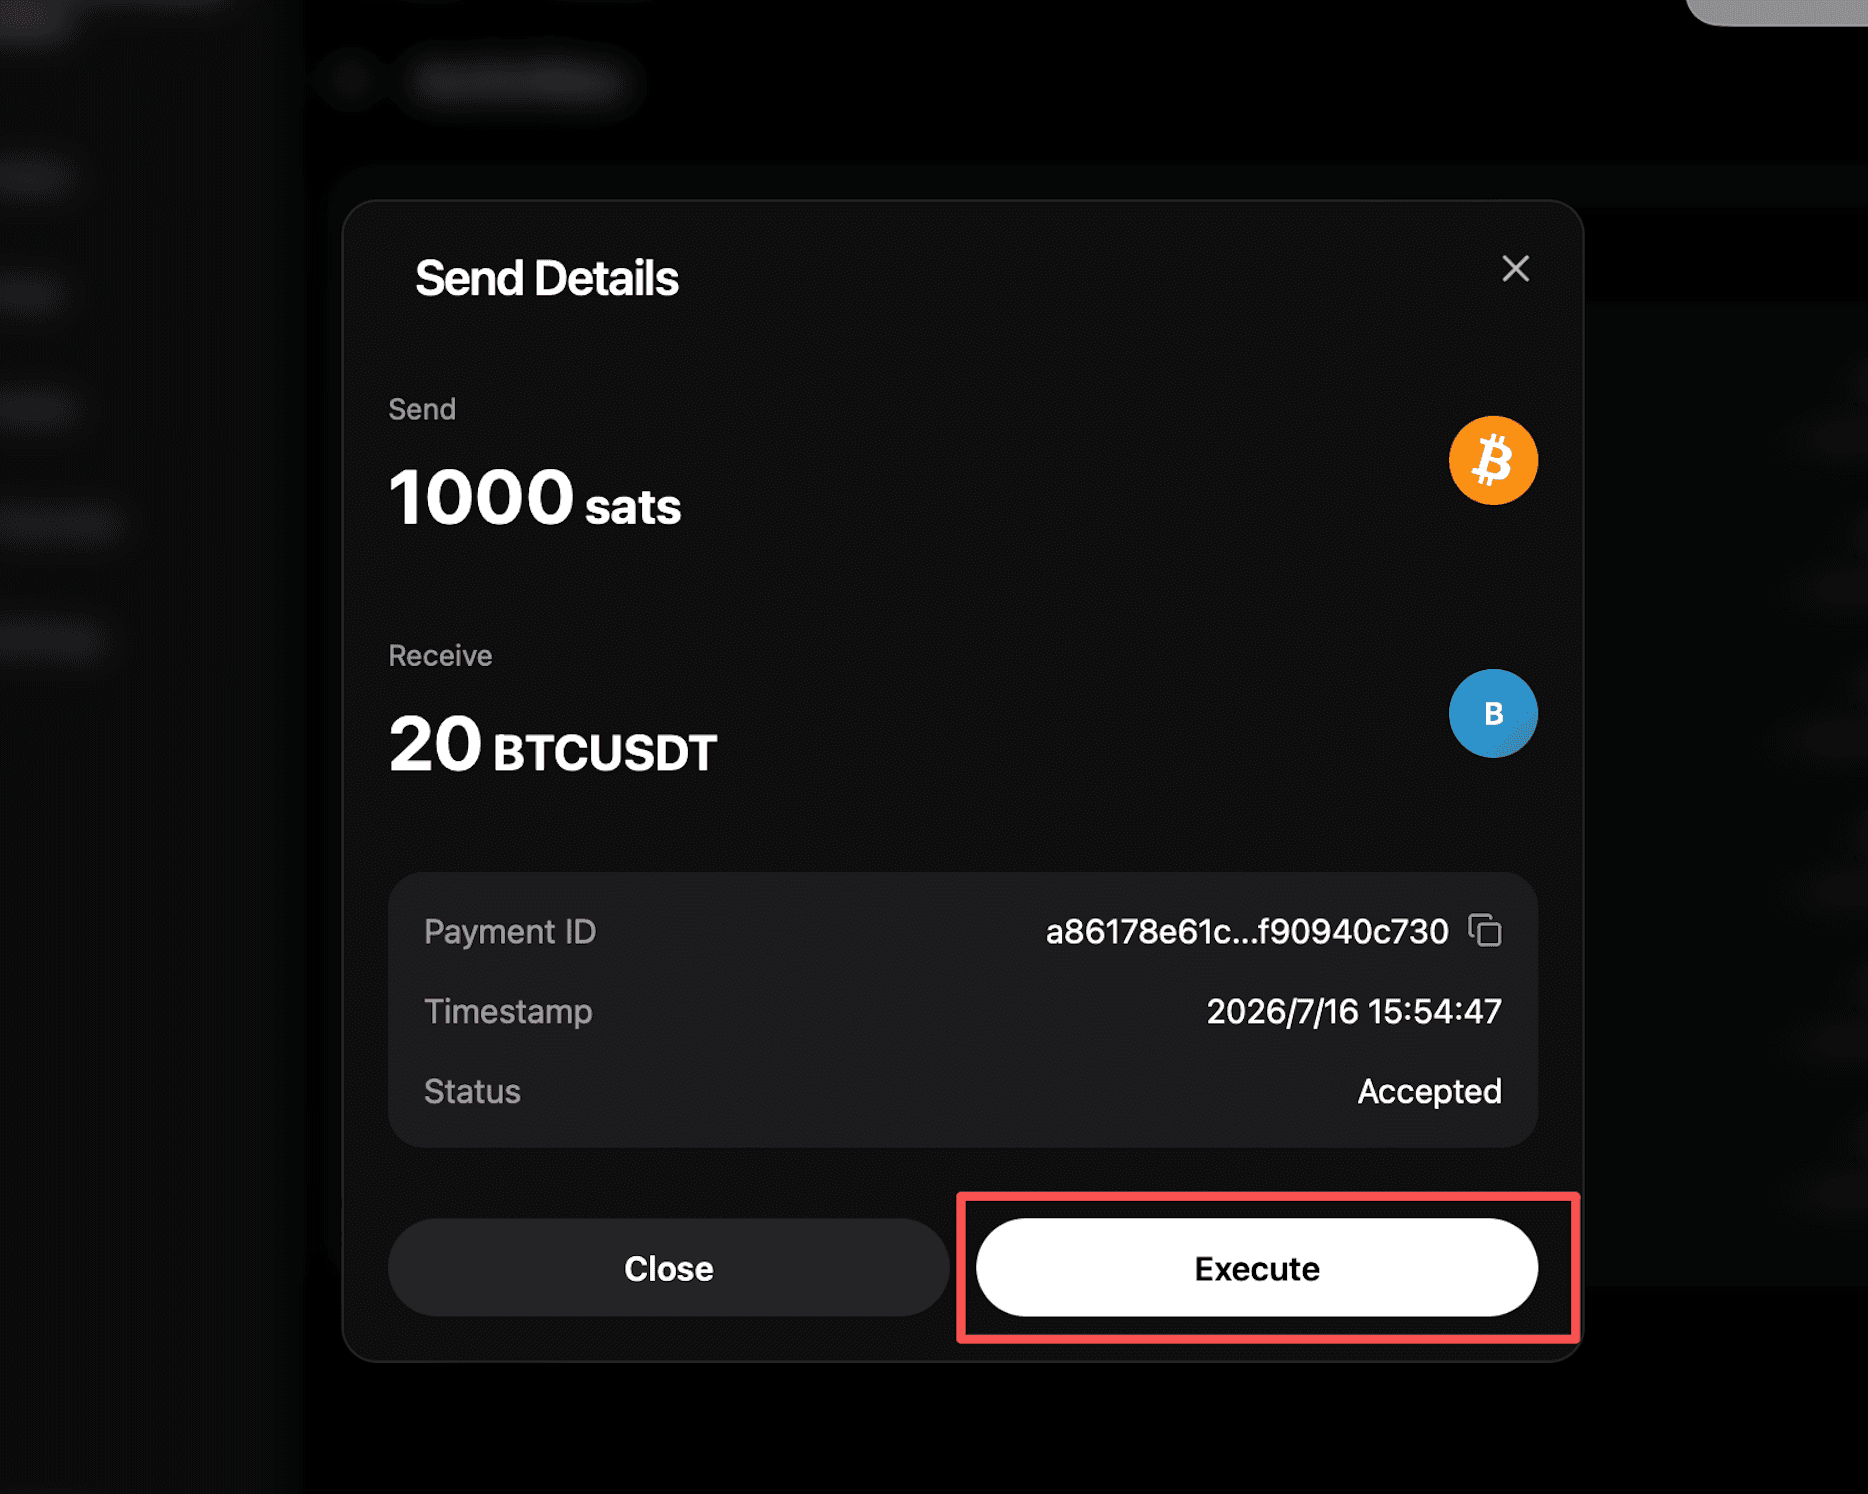
- Locate the newly created record in the Swap transaction list and open its details.
- Click Execute and confirm the transaction.
Once execution succeeds, the Swap is complete.
You can view the local RGB asset balance on the channel page. If you close the channel, the balance will also be reflected on the Assets page after channel settlement is complete.
This completes the BTC → RGB flow.
The RGB → BTC flow follows the same overall process. The key difference is that RGB assets, rather than BTC, must first be moved into Bob’s local channel balance. Bob then creates a Swap quote using the RGB assets, Alice accepts it, and Bob completes the transaction by clicking Execute.
BTC → RGB Summary
-
Alice sends BTC to Bob through the Lightning channel, providing Bob with local BTC liquidity for the trade.
-
Bob creates a Swap quote using the BTC and RGB amounts, then copies the generated RGB invoice.
-
Alice imports the RGB invoice and accepts the Swap.
-
Bob locates the transaction in Activities and executes it.
-
After completion, the updated balances can be checked on the channel page or, after settlement, on the Assets page.